Hindhead Tunnel
The A3 Hindhead Tunnel is the longest road tunnel in the UK, being built to remove the A3 from the huge bottleneck at Hindhead itself. These photos were taken on an open day which was held on the 14th May 2011, in which the public were invited to walk through it. Below is a selection of photos taken from this day, and also showing the state of the A3 a few weeks before the tunnel opens, at which point Hindhead itself will change forever.
My day and walk was extended a bit by the fact that I arrived at Hindhead only to break down on the A3, meaning a quick run to the nearest petrol station was called for whilst seizing the bonus photo opportunity. As ever you can click on each photo to enlarge it.
Update: The southbound tunnel opened on the 27th June, to much local support and quite a lot of traffic.
Standing on what will soon be the A3, at the southern entrance to the tunnel, as people begin to walk through.
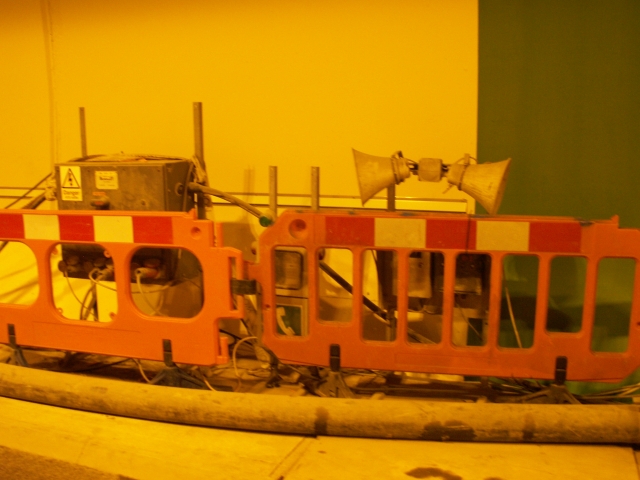
Some tunnel equipment. There are 104 CCTV cameras in the tunnel, and sensors by the entrance will detect pedestrians and cyclists who try to travel through.
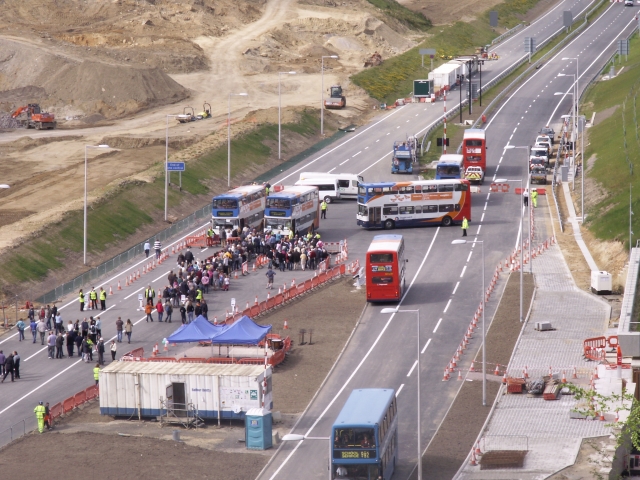
It's getting busy! An estimated 21,000 people had shown an interest in applying for the 7,000 tickets to attend the event, and they sold out within 24 hours, having crashed the website in the process.
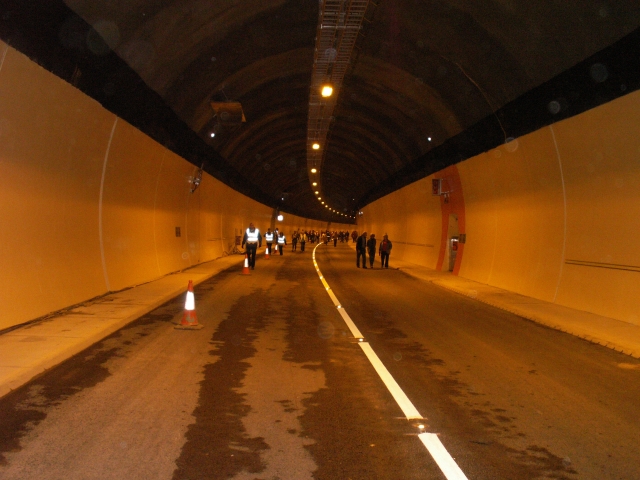
Once you're inside it all looks the same! The verges are designed to meet disability legislation, and are a far cry from the emergency walkways seen in the Blackwall Tunnel.
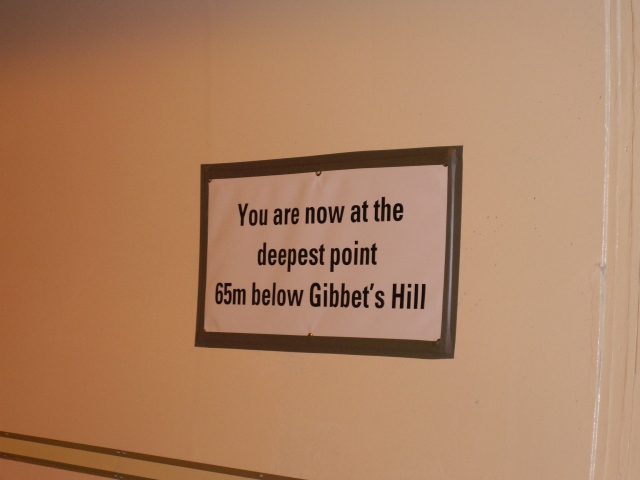
A sign announcing the breakthrough point, which was quite off-centre as most of the digging was done from the northern end, which is further from any residences.
A slight left curve. The cat's eyes appear to be LEDs which glow even when there are no headlights, but this could be an illusion caused by the tunnel lighting.
Looking up at more of the electronic signs. They face both ways so that the tunnel can safely operate a contraflow. This will be tested with a simulated incident taking place shortly before the tunnel opens.
To the right now. The road looks pretty wet, which is impressive for something that is technically indoors.
A road cone, with a bit more Hindhead Tunnel in the background. The lighting gets less frequent as we get further in.
The north portal of the tunnels. The northbound (right) tunnel was actually shorter, but it was then extended by having its roof re-applied.
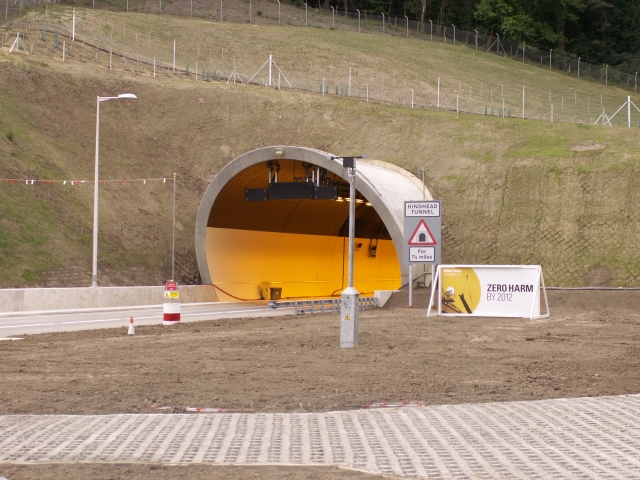
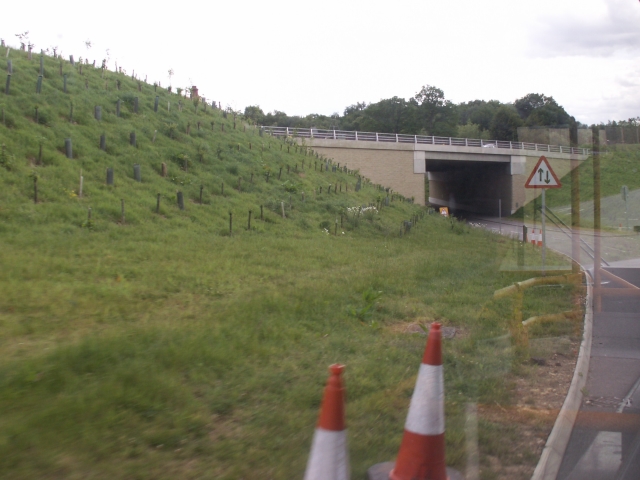
The southbound entrance to the tunnel. The whole project won best in its class at the New Civil Engineer International Tunnelling Awards in 2010, for the way it has been planned and implemented.
A quick peak at the rest of the A3 as it opens out beyond, with an average speed camera which polices the tunnel's variable speed limit. At the northern end local music groups performed specially composed pieces for people waiting for the buses - I presume they won't be there when the tunnel opens.
And on the other side, here's the improved Little Hammer Lane, which used to plug directly into the A3.
A much wider view of the whole north portal, where you can see the sheer size of the works area. Sheltered to the right is the primary tunnel control building.
A close-up of the crossover point, which allows contraflow running. Today the buses are picking people up and taking them back through the tunnel.
Some works are still taking place - it looks like landscaping is happening here, using some of the 737,000cumecs of earth that were excavated from the tunnel. Much of what is excavated here will be put on top of the old A3 when it is returned to nature.
The next is this sign, which tells you that there's not long to go! (Seven weeks, at the time of taking it.)
All the new rotating prism signs have been put in place, which can warn traffic to leave at Hazel Grove when the tunnel is closed. More signs have been put in place further back at the Bordon exit, which forms part of the long-distance diversion.
Remember these as there'll be a test on them at the end. By now we've hit the usual Saturday afternoon crawl into the bottleneck.
This sign, warning prohibited traffic to leave, will come into play soon. The old carriageway of the A3 here is now an unclassified local access road, running behind the noise fencing to the left.
...where we are promptly shoved off the road. Note one of the prism signs has been rotated to say "Tunnel closed", which is true.
The slip road at Hazel Grove, with predictable Hindhead congestion. The sign currently showing 'A3' will show 'A333' when the A3 changes path.
Looking south along the current A3 Portsmouth Road. This road will be traffic calmed when the bypass opened, seeing it downgraded from one of the most important roads in the country.
...and looking north, towards Hindhead. The congestion here has characterised the area and it'll be completely different when the tunnel opens.
In Hindhead village itself now, at the infamous traffic lights. I took this photo to compare it with the same view from 1986.
It's not just the A3 which has problems here. This is the A287 Hindhead Road, which gets very little green time thanks to the A3, but will become the main road once the tunnel opens.
Looking south once again at the notorious crossroads. From here you can clearly see how the Happy Eater from 1986 has been redeveloped.
Looking south from the National Trust entrance. Some of these businesses, particularly the Devil's Punch Bowl Hotel, are probably pretty worried about how the road closure will affect them, but they might find the lighter traffic makes things easier.
Still heading north along the A3, where the road snakes along the edge of the Devil's Punch Bowl. This will become a bridleway when the tunnel opens.
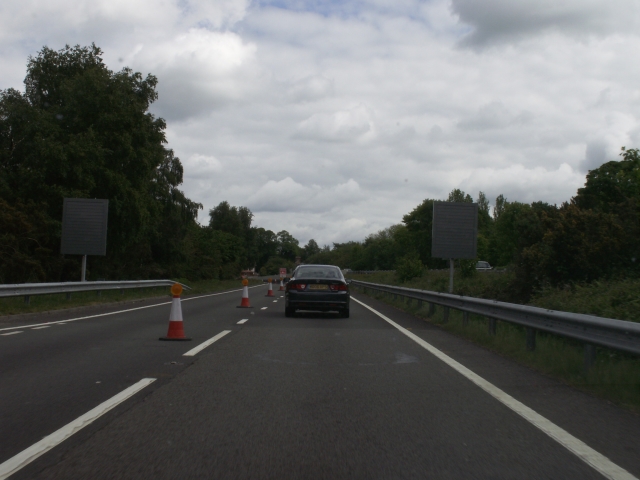
Here's the bend in question, with a short bit of dual carriageway to try to reduce the number of accidents here.
Here's where the old and the new meet. As part of the roadworks, the northbound carriageway has been put on a temporary alignment whilst the southbound side uses the old northbound. It makes sense, honest.
The Devil's Punch Bowl, with a coach making its way round on the A3. The noise of the traffic can be heard from quite a distance away.
In the Devil's Punch Bowl café is this map, which shows the improvements quite clearly. The grey is the extent of the tunnel while the red line is (roughly) the old road. 4,000 drawings were created to present the schene.
Heading back along the old A3 to the Hazel Grove roundabout, with this sign directing you through (as the junction is new, there are no old signs to guide you).
Finally, here's the Woolmer Hill exit on the new alignment, before we return to the traditional, NSL, dual carriageway A3.
More A3 Photos
If you like your A3 history, you may enjoy these photos of places like Cobham before they were bypassed.